I guess I’m just not a good blogger.
I’m still here… really.
2
I guess I’m just not a good blogger.
Last night I finally observed the 3 remaining Messier objects on my list. I have now observed all 110 objects on the Messier list. I just leveled up in this hobby.
Let’s take a step back. What is a Messier object? In the 18th century, comet hunting was a pretty big deal. A french astronomer, Charles Messier (Chuck), was a comet hunter. In his quest to find comets, he created a catalog of faint, fuzzy, objects in the sky that stayed static relative to the surrounding stars night after night. It was not clear what these static objects were back then, they were just not comets. Today we know these various objects in the sky to be galaxies, star clusters, nebula, and supernova remnants. Messier’s list of objects has taken on a new role. It is a great list of deep sky objects for beginner astronomers to observe.
Late in the summer season of 2014, I ordered a modest telescope. The telescope has a 6 inch diameter mirror. By the fall, I had started logging observations of Messier objects with my telescope. I had also contracted a mild case of “Aperture Fever” (the desire to obtain larger and larger telescopes). My wife insisted that I couldn’t purchase a new telescope until I completed the Messier list. This was great motivation.
It took me about 2 1/2 years to complete the list. Along the way I have learned a lot about observing, star hopping, red lights, dew control, and mosquitoes. I have also met some great people at the Minnesota Astronomical Society (MAS) and the Glacial Lakes Astronomers and Stargazers Society (GLASS).
I have leveled up, and unlocked resources. It’s time to hit the save button and go shopping.
I am dusting off this site in order to have a place to share some of my adventures in amateur astronomy. I feel I still have a unique, beginner’s point of view.
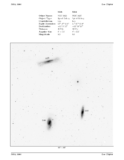
To start with I want to point to a document I have compiled to help astronomers confirm they are looking at the correct Messier object.
(I have hidden many of my old posts as they were linking to photo gallery software that I have since removed from the site.)